Subscribe

RSS Feed (xml)

Powered By

Skin Design:
Free Blogger Skins

Powered by Blogger

Wednesday, April 27, 2011

Sort-a

Not good enough to be "good" . . . .
But not bad enough to discard . . . .


Happy colorbook days, folks
Chae

Thursday, April 21, 2011

From the last glaze load

Hesitate to post this a'tall, and yet, it would make a sweet candy dish . . . .


Happy Candy days, folks    
Chae

Monday, April 18, 2011

Emerald Green


As you will plainly see -- this isn't even close to emerald green !


To the best of my recollection, one can use:
(1)  5 Tin with 3 Copper Oxide
(2)  5 (+/-) Tin with 1 (+/-) Copper Carb
Which, no matter the amount combo should predictably produce a whitish green
Or:
(3)  between 2.5 and 5 Titanium with 2-3 Cobalt Oxide
Which, i think, will produce a medium yellowish green
Or:
(4)  1 Nickle with 5 Titanium and 1.25 Tin -- for a pale green


What i ended up using (hoping for emerald) was:
A base glaze with:
5 Titanium + 2.5 Copper Carb + a dot of Cobalt Carb
Which didn't work a'tall . . . . 


Happy Green Days, folks!
Chae

Sunday, April 17, 2011

Funky Cup Same Glaze

This cup better shows the versatility of the glaze posted yesterday.  It's the same glaze that's on the clunky pot two posts down.
Yes.  Yes!  I know the cup is a rather funky shape but sometimes funky's fun and i often use these types of cups/bowls for glaze experiments rather than tiles which are more or less useless after one sees what the recipe will do !


Happy Funky Cups days, folks !   
Chae

Saturday, April 16, 2011

Mauve Periwinkle Glaze

50 Custer
10 Gerstley
8   Whiting
17 Silica
6   Dolomite
1   Zinc
4   Barium
4   EPK
Add:
7   Tin
1/2 of 1/8th Copper Carb
1/8th of 1/8th Potassium Bichromate

Generally, i glaze one piece at a time, thus i mix up the base oxides, etc., following which, i use approx 2 tbsp of the mixture and add whatever coloring agents i'm going to use to that.  Add approx. 20ml of water.
(Had read early on in my potter's studies, that glazes which set in buckets for long periods of time are often unusable in later months.  However, dry ingredients, combined and waiting for the addition of the water, will stay workable for an indefinate period of time -- which is why i creat my glazes this-a-way.)
The above is a cone 8 to 10 glaze.  But i fire at 2200 degrees with a 15 minute hold -- so i use a cone 5-6 clear glaze applied over this to bring the maturing temp down.
Hugs
Chae

Color Improves Chunkiness


This is how the clunky jar turned out. 
Every once in a while, glaze will rescue a bisqued pot.  In this case, it slimmed it down and reduced the chunkiness of it.  And too, it's one of my favorite glazes.  Love the way it breaks into a mauve and periwinkle over texture !
It stands 15 inches tall by 5 n' 1/2 inches wide at its widest point.


Happy Glazing  Days Folks
Chae

Friday, April 15, 2011

Igor Savitsky's Uzbekistan Museum

The creation of the following pot was inspired by a documentary on Savitsky's attempts to paint the desert's colors around the Nukus area in the Republic of Karakalpakstan. 
Evidently, after being criticized by a famous Soviet painter/artist, Savitsky gave up his career and established a museum in Nukus which focused on contemporary Russian art and also contained ancient Russian cultural artifacts.


This "desert sands" pot stands 9 n' 1/4 inches tall and is 5 inches wide.


Happy Uzbekistan days, folks
Chae

Uninspired But Functional

The title says it all.  The underlying glaze had enough slippery-slidey fluxes in it to make all my painstakingly applied "flowers" and "stems" blur into a pastel Monet-type visual.  Haven't a clue where the pinkish hue came from in the underlying glaze as the ingredients just didn't support the color.
Soooo . . . here it is:  uninspired but functional.  A nesting set of dishes -- largest is 8 inches by 2 n' 1/2 inches deep;  the medium sized one is: 6 n' 7/8's inches by 2 n' 1/4 inches deep and the smallest is:  5 n' 1/4 by 1 n' 6/8ths inches deep.  Measured the width at the narrowest point.  Add 2 inches to the size to include the handles.


Happy stacking dish days, folks
Chae

Wednesday, April 13, 2011

From Yesterday's Kiln Opening

Between the long-necked pot posted yesterday and these goblets today, one could believe i was in a very harlequin-ish, Cyrano de Bergerac mood both at the wheel and in the glazing room !!!


Hugs
Chae

Tuesday, April 12, 2011

Finished Long Necked Jar

Out of the kiln this morning


Happy Long Necked Jug Days Folks
Chae

Sunday, April 10, 2011

Cups

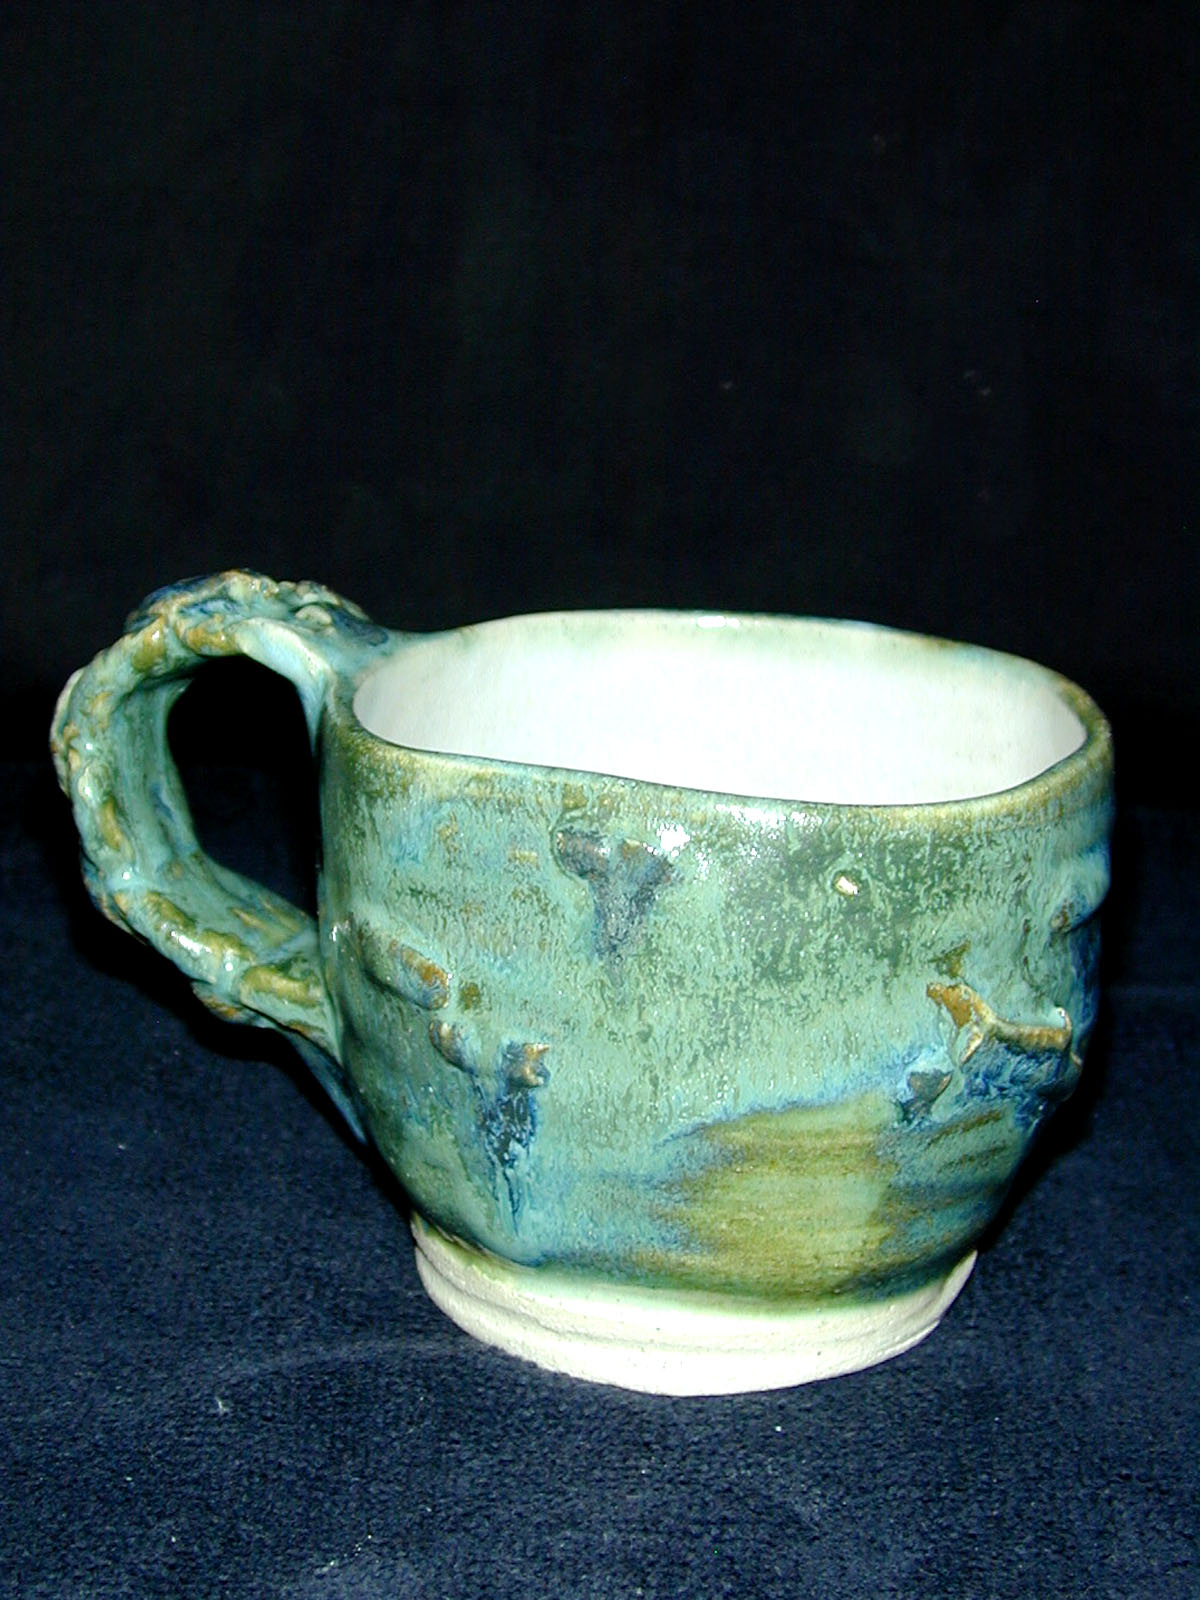
Here are a few of my recent cups.
And a close up of three o me favorites: 
  

Happy Beverage Days Folks
Chae

Tuesday, April 5, 2011

Decals and Casserole Dishes

While we're on the topic of casserole dishes.  This is one which was done back while i was still experimenting with decals.  Not, perhaps, my favorite, but others seem to like it, so have kept it around.
It's a mini-mini, but a lidded casserole dish nethertheless.


Happy glazing days, folks
Chae

Monday, April 4, 2011

Rhodes' Glazes

For Joel
Rhodes' #18 is a ^6 Satin Matte base:
45   Custer feldspar
15   Frit 3134
25   EPK (kaolin)
15   Dolomite
5     Gerstley Borate
5    Barium Carbonate
Can use a variety of colorants with this, particularly cobalt (5%) and mixtures of copper and rutile.  Very good with #15 over the top.

Rhodes' #15  Smooth Opalescent ^6 Base:
25   Frit 3134
45   Custer feldspar
20   Gerstley Borate
10   EPK (kaolin)
A smooth, glossy glaze. 

I'm not particularly partial to matte glazes, so i always use the #15 gloss over the #18 for the glossy effect.
I'm not sure at this moment what the web-address for John Post is, but am pretty sure it's listed in the side bar somewhere's as i'm most impressed with his recipes.  Also, way back in the archives, you'll find 2 of his recipes which worked well together for me and produced reds.
Good luck, Joel
Hugs
Chae (Lee Ellis)

'Nother Casserole


Ah sure now an' the casseroles have it. 
This one is a double-walled, cut-out design.  It measures 6 n' 1/4 inches tall by 6 n' 1/2 inches wide at its widest circumference. 
However, the interior dimensions are 3 inches tall by 3 n' 1/4 wide. 
It will hold a dab of this and a dash of that n' perhaps a cup n' a half of rice.  The beauty of this dish is:  whatever you put in it will stay hot for an extra long time because of the double walls.


Happy double-walling days, folks
Chae

Sunday, April 3, 2011

The Casserole Series

Ha!  I'm only showing the completed casserole dishes where the lids fit !


Here's one with a modified Ocean Green glaze fired to 2200 degrees with a 15 minute hold.


Measures 5 n' 1/2 inches tall and 8 n' 3/8ths inches wide.  Would tell you the quart capacity but am not quite sure how to measure that !!! 
Would-ja believe i cook by my grandmother's method, a pinch of this, a pinch of that; then, she would spread her hands and say:  "and this much".  Since her meals were delicious, i never questioned her methods . . .


Happy Casseroling Foks
Chae

Saturday, April 2, 2011

Kiln Opening

When i first subscribed to blogger.com, their photo uploader was excellent.  I could put photos in the order i wanted them with proper visual spacing.  Then during the summer my computer went down and it's taken me this long to replace the computer, only to discover that blogger changed its photo application perimeters !!!  This new system stinks !!!  Find myself spending more time just trying to get photos to display the way i want them than it did to film the photos, off-load them from the camera and download them to the computer and disk !!!  Am so frustrated right now for i've spent the last 20 minutes just trying to get the photos to upload in the series of occurrances !!!

This is the first time i've thought to take photos of a completed bisque firing in the inside of the kiln!  This load had several tall pots, so it was loaded to accomodate those.  There were 3 layers of pots on the other side of them.  Fired to 1828 degrees yesterday.  Unloaded shortly before noon today.


 Third Layer

Second layer

Bottom layer.
Happy Kilning Days Folks
Chae

Friday, April 1, 2011

Casserole Dishes

I have a dickens of a time creating casserole dishes because they require lids.  Now creating the bottom part, or the bowl, isn't hard.  And creating the lid isn't hard either.  Getting them to fit perfectly together, however, is a near impossible task !!!
The use of callipers should make this an easy task, right ?  After all, you are measuring to a pre-determined size, and the lid corresponds to the calliper measurement.  Oughta fit snuggly together.  Hmmm . . . wish it worked that-a-way.
Oh well, after throwing lots more than many -- here's a small casserole dish which did work.


Happy casseroling days, folks !
Chae